
Over the last week or so I have purchased all the hardware for the body of the guitar (minus the neck plate, as I plan to have one specially made with the "Collins" logo engraved on it along with the serial number 0001.

The first purchase was the bridge. I opted for a vintage style "ash tray" type bridge. I plan to replace the saddles with a modern strat-style set as they're generally more reliable and comfortable to play.
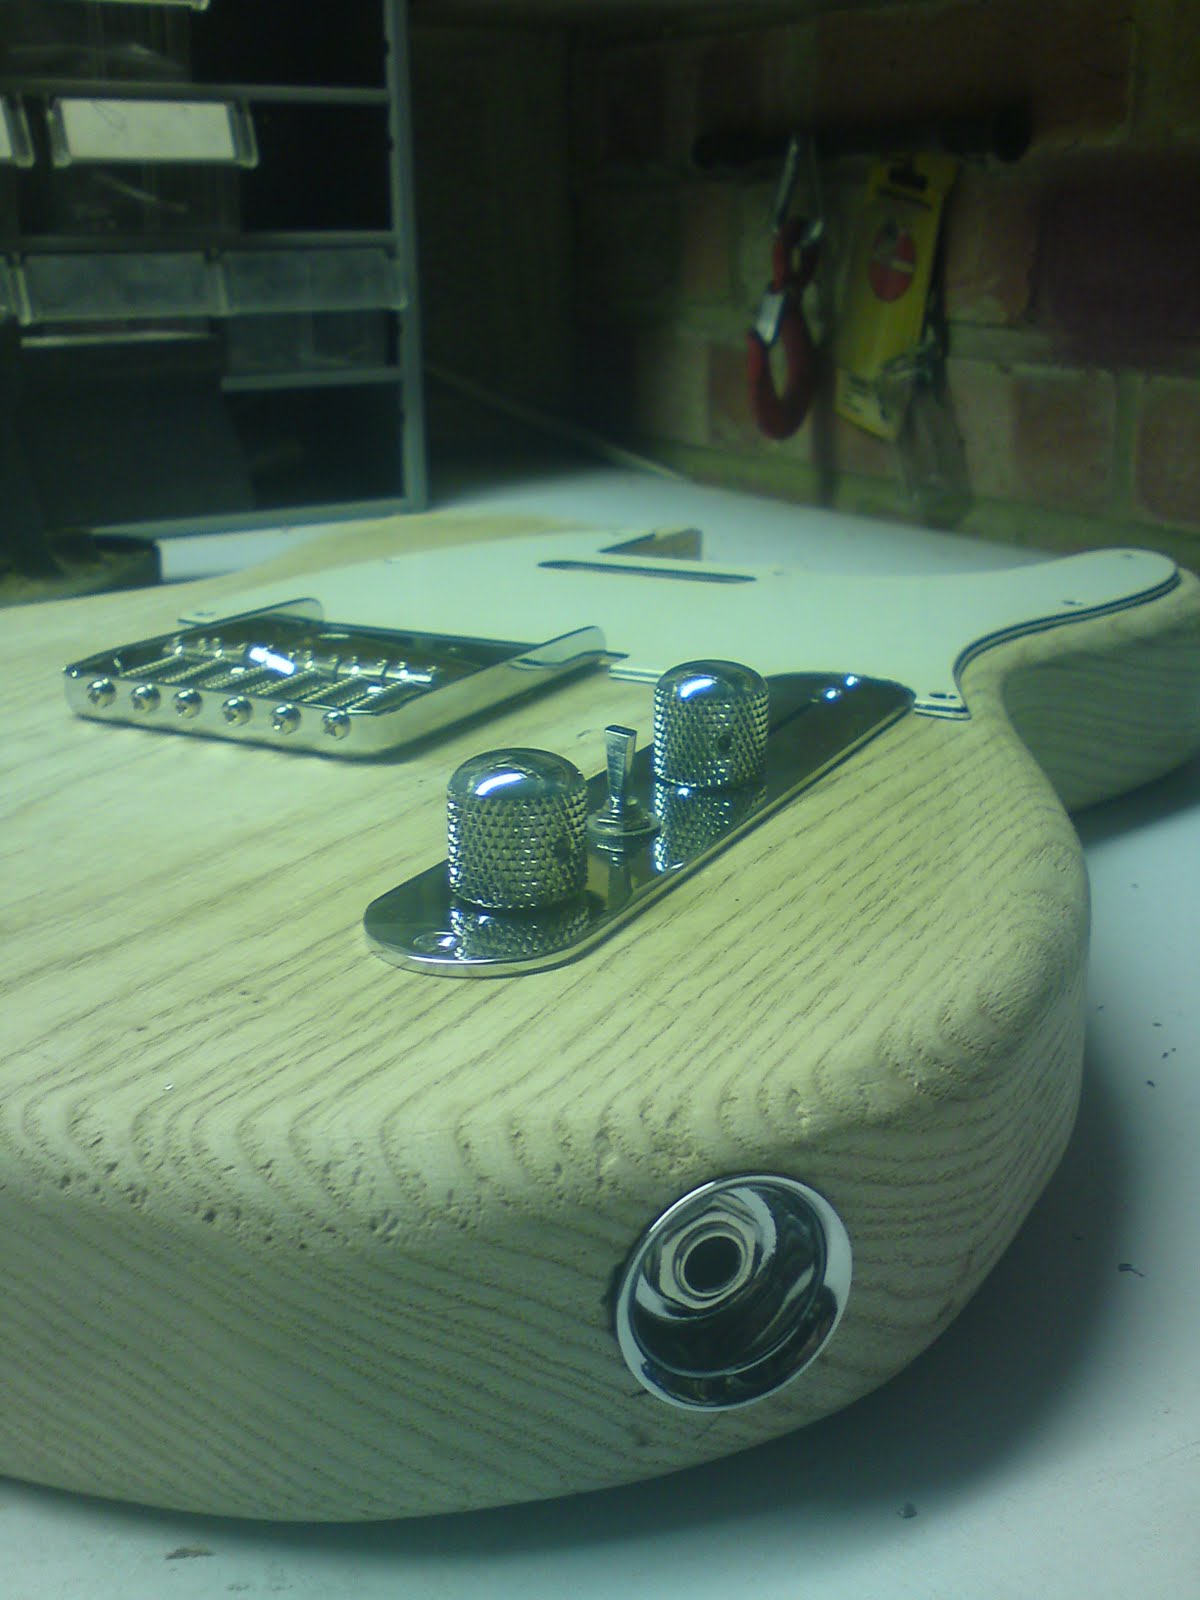
After this I installed the jack socket disc by creating a small pilot hole and the using a large hole cutting drill. This was very nerve racking because as can be seen in the picture, there is not much room for error due to the guitars thickness, and the hole is the size of that plate.

I have already attached all the controls etc to the chrome plate. There are a few alterations on this plate compared to a standard Telecaster. The pickup switch has 4 positions instead of the usual 3 to allow for an extra sound not usually found on a Telecaster.

(The white plate in this picture came from a friends guitar, and was just to get an idea whilst the black plate was being sent in the post.)
There is also a mini toggle switch between the volume and tone control which is wired as a 'direct through" mod, so that the volume and tone control can be bypassed to create a really bright Telecaster tone. This will also be useful when using different levels of volume whilst performing.

I misjudged the depth needed in this cavity to fit the pickup selector switch. The hole needed to be an extra 8mm deep. As my router could not go any further, I used a 10mm drill bit with masking tape around it as a depth indicator and drilled several holes to the right depth in the wood. I then joined all the holes together and removed the wood using a hammer and a very sharp chisel. I only needed to do half of the cavity as there is plenty of room for the other controls, as can be seen in the next picture. It doesn't look pretty, but this area of the guitar won't be visible once finished.
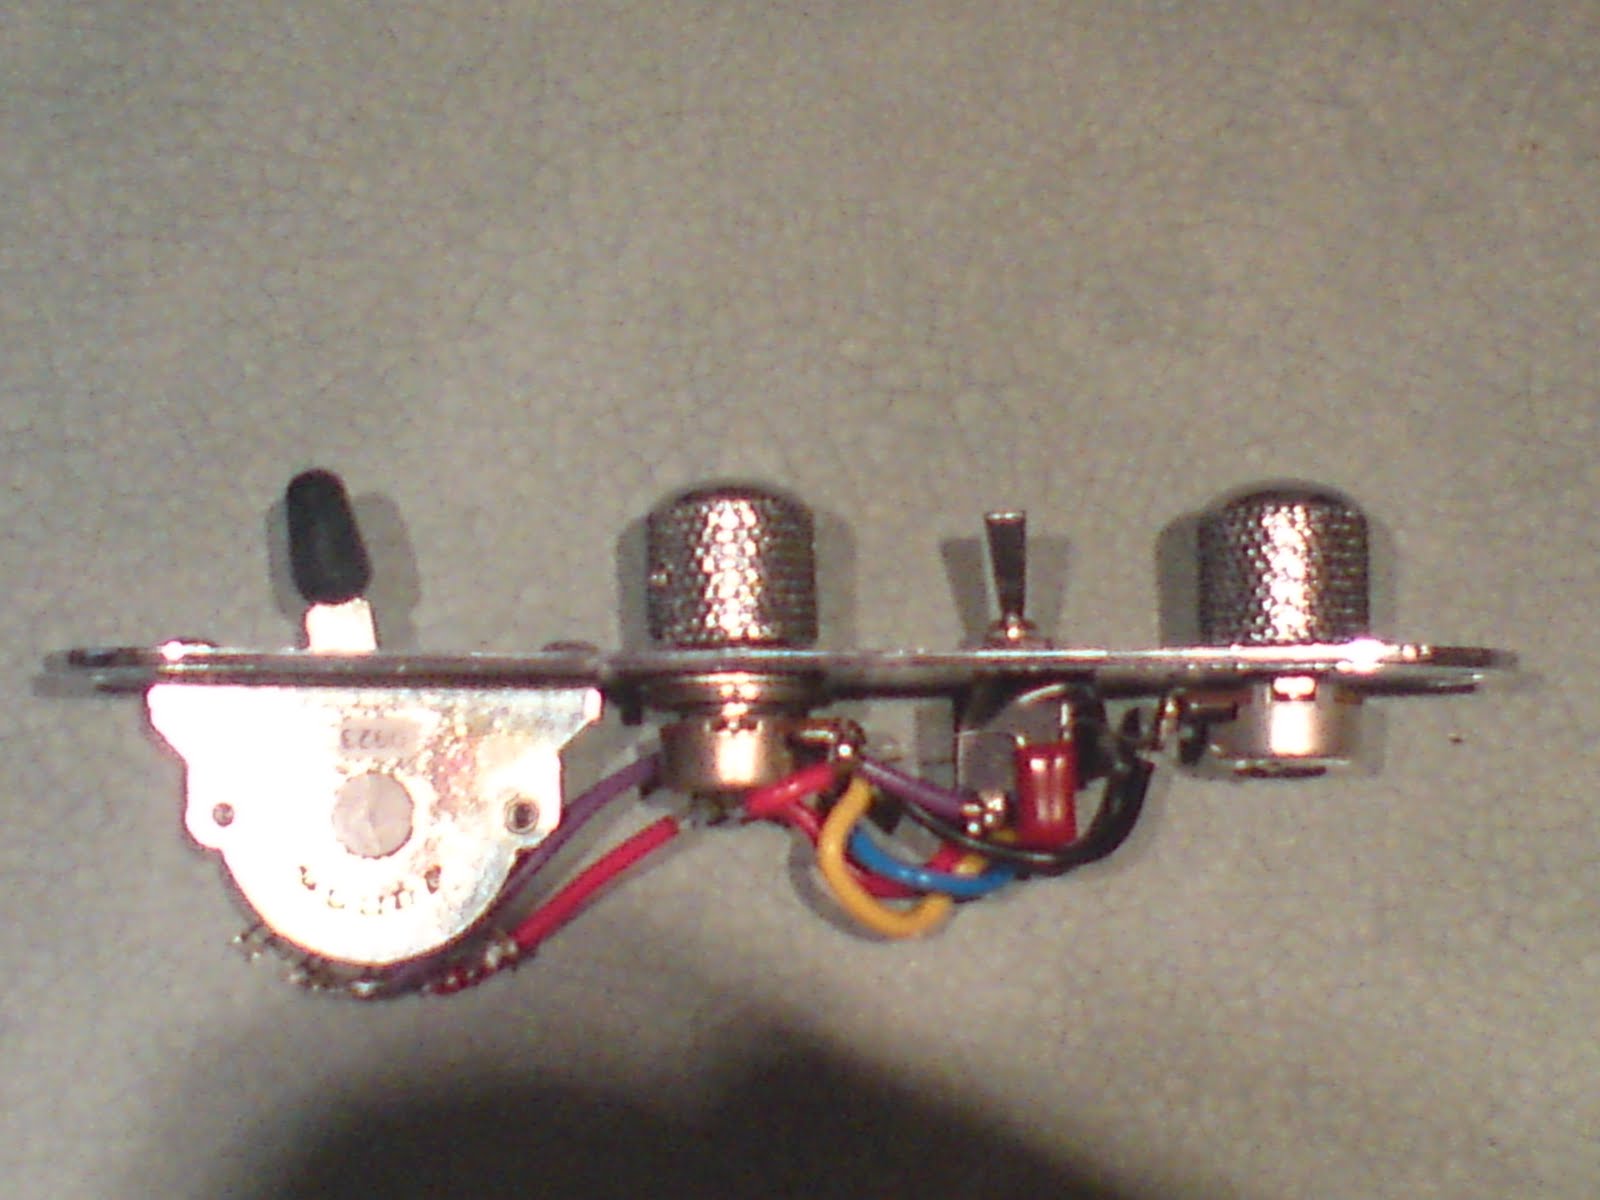
This is the wired control plate. Once installed the jack socket and pickups can be soldered to the correct places. Several different colours of wire have been used as it is quicker to work out each wire's purpose than having them all the same colour.

Here is the guitar with all the hardware and the correct coloured jack plate.
Next week I shall be ordering the paint and lacquer, and so shall be starting the final preperations for the body!
- L
No comments:
Post a Comment