Tele Design

Tele Design
A rough design for this project

Wednesday 29 September 2010

Finished Product!

Hello world.

So this morning I bounced from my bed and waited for the postman too arrive with the pickups for my guitar....


They look very pretty in the boxes, but even prettier when screwed into the bridge and scratchplate like so:


Once they were soldered in, I screwed the scratchplate, control plate and bridge into the body.


After that, I strung the guitar, set the nut height, installed string trees, set the string height and adjusted the intonation...

So here are numerous photos of different angles.


So there we are, in alot less time than expected I have built an electric guitar. After the strings have settled in and I have finished small action adjustments I shall post some youtube videos or MP3's, whichever I find easier at the time.

-L

Monday 20 September 2010

Attaching the neck

Hello World!

After going on holiday for 12 days, I returned to find the guitar body dry and ready for some work! Funny that.... It's almost like I planned it to be drying whilst I was away and couldn't mess with it, strange.

I began by lining cavities with aluminium foil to prevent interferance and hum with the pickups.


I've heard mixed feelings on if this actually works, but I figure it couldn't hurt.


I also fitted the jack plate at this time.


These are a pain as they have a small clip the other side of the plate to hold it into the guitar. Hopefully I shouldn't have to ever remove this.


Here is the strap I bought whilst on holiday, along with the neck purchased for £50 on ebay. It is a Korean made maple neck with a maple fretboard.


This is the neck push-fitted onto the guitar.


The join is pretty good for a first attempt. I know where I went wrong this time (not using a straight edge along with the router) so the next guitar will be a better fit.


I found a company on ebay that makes custom engraved neck plates for £17. I feel this had to be done!


I printed the logo onto clear sticky-back paper and cut round it as close as I could to the edges. This was test fitted prior to actually applying it to the guitar.


Before attaching both logos, I sprayed the headstock with a few coats of clear lacquer. This will protect the headstock and means that there is no varient in colour underneath the logo transfer.


Once the decals were applied, I masked off the fretboard, and continued spraying a few light coats of varnish to protect the logos.


Once the final layer of lacquer on the neck had dried, I drilled the holes through the back of the body to attach the neck, using the neck plate as a guide. Using a pencil I marked out the pilot holes for the neck and drilled them, so the wood didn't split. After this, I clamped the neck to the body and screwed the neck on.


The headstock came out quite well. there is a slight line on the edge of the decal, but it's only noticeable if you look up close.

Well this is nearly it for this build. Just gotta buy an upgraded nut along with saddles for the bridge, pickups and machineheads.

So the next post will be the last about assembling the guitar, followed by a post with final pictures and links to sound clips/videos.

-L

Saturday 28 August 2010

Body Spraying

Hello World

After going away for a few days, I came back to a nice parcel full of sandpaper, lacquer, amber paint and grain filler.

So I did the natural thing and began painting the body.


I began by coating the guitar in translucent grain filler. This stuff does what it says on the tin and fills the open grain of the wood to create a smooth surface. This makes painting and lacquering much easier due to the flat surface. This also means the finish will be nice and smooth, as well as even all over.


After the front the back was done. It was at this point I learnt the important lesson not to grain filler on your fingers, as it's quite sticky and takes ages to remove! After the grain filler dried the body was sanded smooth all over.


I tested the amber spray on the offcuts of wood to see how the colour varied with the number of coats applied. In the end I decided to use 3 coats of Amber, after a single coat of the lacquer. This created a rich colour that looked aged, without spoiling the beauty of the grain.


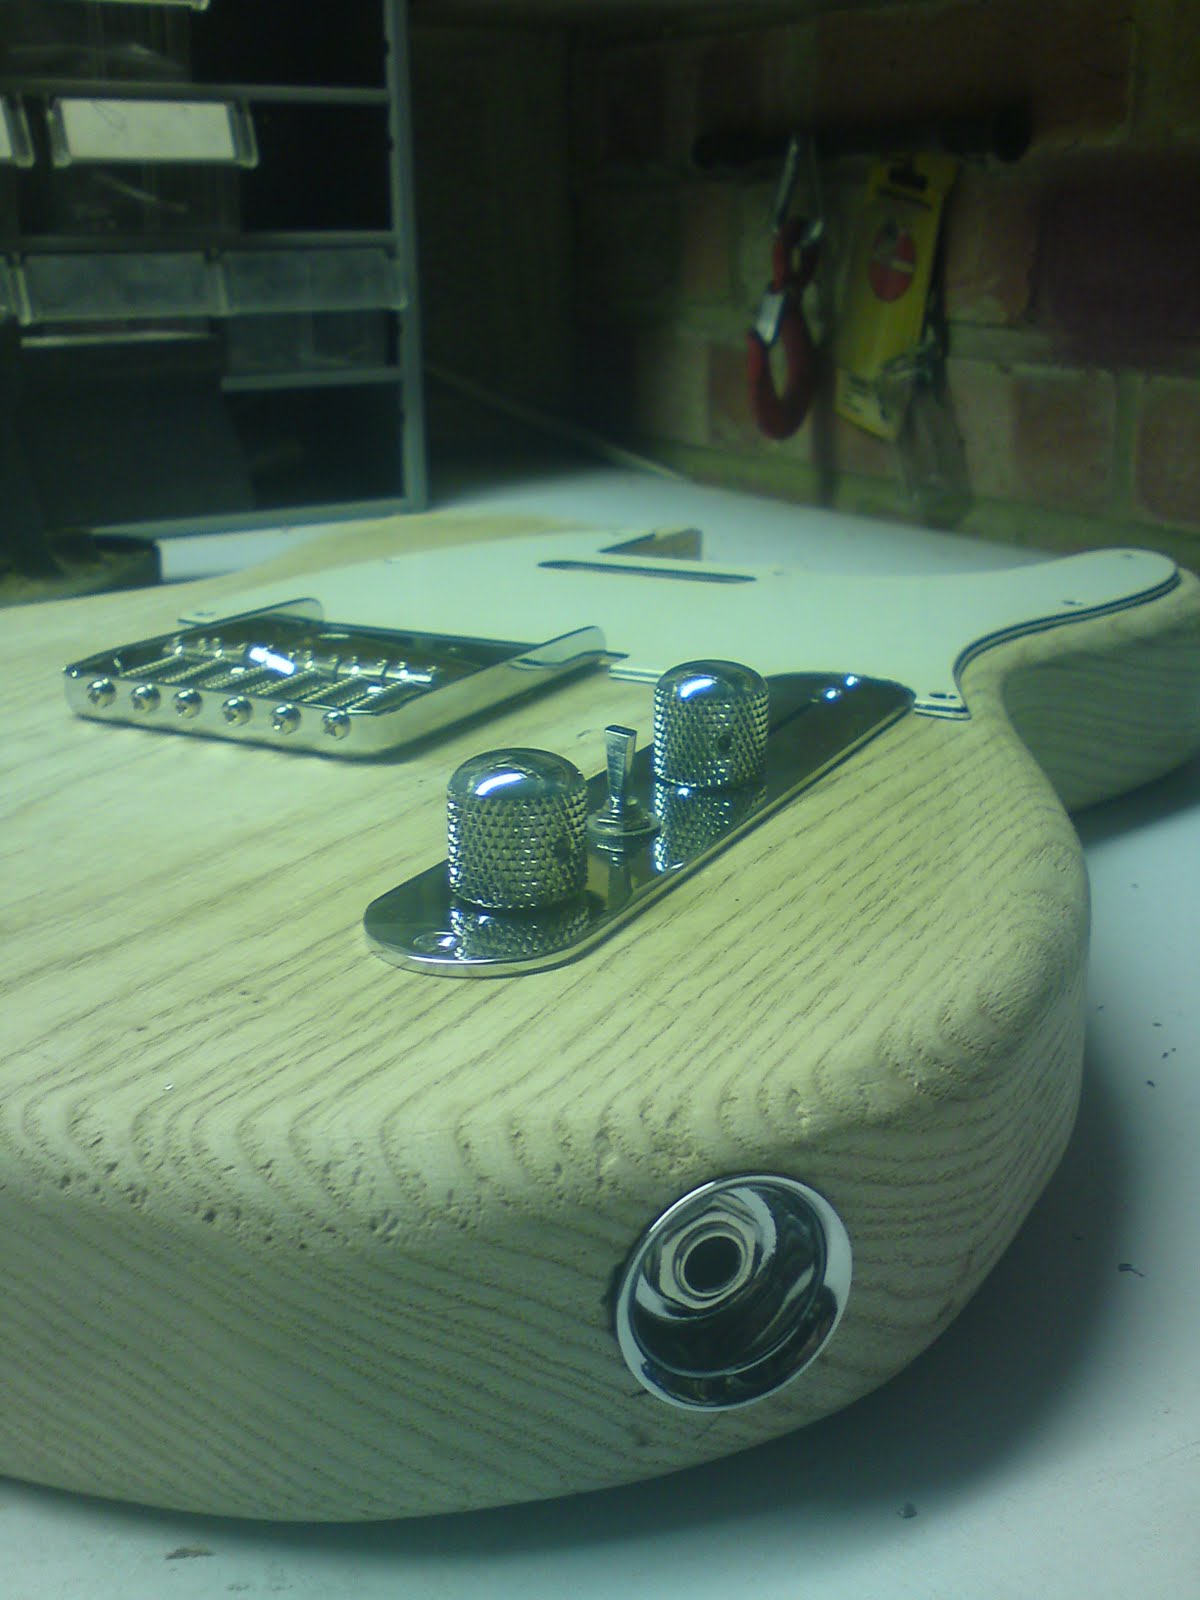
Prior to painting, all the cavities have been masked up to prevent them being painted. When researching this build I read an interesting theory that ideally there should be no lacquer or paint inside cavities, just the natural wood. Laquer and paint should be absent where it cannot be seen, so that the bridge, pickguard and control plate are all in direct contact with the wood to help the resonance, as well as the neck pocket being clean for a smooth fitting of the neck. (This theory might be a load of rubbish, however I figure that it can't hurt.)


I made a spray booth out of 2 cardboard boxes gaffa-taped together, and hung a chain + hook from a ceiling beam, so the guitar could be left to dry without smears or finger prints. The boxes prevent excess lacquer and paint covering the inside of my garage. I bought a trigger attachment for aerosol cans to make spraying that little bit easier.


As can be seen in this pic, most of the section under the pickguard has been taped off. I was very careful not to go too close to the edge of where the pickguard will go. Due to the toxic nature of the nitrocellulose lacquer used, I wore a half face mask with a built in air filter throughout the spraying process. This mask was put on before even entering the garage, and taken off upon leaving into the fresh air.

Nitrocellulose was chosen as it is created using natural materials, meaning it allows the wood to breathe opposed to modern synthetic lacquer, which encases the wood. I like the idea of this guitar being able to age over the years as opposed to being preserved.


Here is the front of the guitar after the very first coat of lacquer. This seals the grain allowing a starting point for the rest of the paint and lacquer.


Here is the back of the guitar after 3 coats of the amber paint. I am aware that the holes for the string furrules are not perfectly aligned. This is due to the holes being drilled by eye after the string holes were drilled from the top of the guitar. I know for next time to use a drill press. This is purely a cosmetic flaw and will not affect the playability of the guitar.

After the 3 coats of amber, I began applying the lacquer, sanding after every 3rd coat. This builds up the layers gradually allowing for an even finish.


After 9 coats, the guitar is finished and now has to be left hanging un-touched for 3 weeks for the lacquer to cure. After this it can be lightly sanded, buffed and polished to bring out the finish.

Next step is to begin fitting some of the hardware, decide on pickups and most importantly, choose and purchase a guitar neck.

I have decided to buy a neck due to the technicalities of constructing a neck entirely out of one piece of wood. I shall still be finishing the headstock shape, adding a logo on the headstock and lacquering the neck myself.

-L

Monday 16 August 2010

Hardware Purchase

Hello world!

Over the last week or so I have purchased all the hardware for the body of the guitar (minus the neck plate, as I plan to have one specially made with the "Collins" logo engraved on it along with the serial number 0001.


The first purchase was the bridge. I opted for a vintage style "ash tray" type bridge. I plan to replace the saddles with a modern strat-style set as they're generally more reliable and comfortable to play.


After this I installed the jack socket disc by creating a small pilot hole and the using a large hole cutting drill. This was very nerve racking because as can be seen in the picture, there is not much room for error due to the guitars thickness, and the hole is the size of that plate.


I have already attached all the controls etc to the chrome plate. There are a few alterations on this plate compared to a standard Telecaster. The pickup switch has 4 positions instead of the usual 3 to allow for an extra sound not usually found on a Telecaster.


(The white plate in this picture came from a friends guitar, and was just to get an idea whilst the black plate was being sent in the post.)

There is also a mini toggle switch between the volume and tone control which is wired as a 'direct through" mod, so that the volume and tone control can be bypassed to create a really bright Telecaster tone. This will also be useful when using different levels of volume whilst performing.


I misjudged the depth needed in this cavity to fit the pickup selector switch. The hole needed to be an extra 8mm deep. As my router could not go any further, I used a 10mm drill bit with masking tape around it as a depth indicator and drilled several holes to the right depth in the wood. I then joined all the holes together and removed the wood using a hammer and a very sharp chisel. I only needed to do half of the cavity as there is plenty of room for the other controls, as can be seen in the next picture. It doesn't look pretty, but this area of the guitar won't be visible once finished.


This is the wired control plate. Once installed the jack socket and pickups can be soldered to the correct places. Several different colours of wire have been used as it is quicker to work out each wire's purpose than having them all the same colour.


Here is the guitar with all the hardware and the correct coloured jack plate.

Next week I shall be ordering the paint and lacquer, and so shall be starting the final preperations for the body!

- L

Monday 9 August 2010

Routing Goodness...

Hello world

Over the past couple of days I began the daunting task of routing the control cavities, the pickup cavities and the neck pocket.

I began (foolishly) with the neck pocket. Really I should have done the other areas first to re-familiarise myself with the router, and then done the hardest part... Rather than vice-versa! The other 3 cavities have a margin for error, due to being covered up once the guitar is complete. Whereas the neck pocket will always be on show and needs to be perfect in order for the neck to sit properly.


I clamped the guitar to a work bench, and then clamped the template I'd previously made on top of the guitar. After the neck pocket I gave up on the template, other than using it to draw the location of the other cavities. I was confident enough in accurately routing to the lines and the template actually made it harder to see what I was doing.


I routed roughly 5mm at a time in order to minimise the amount of wood burnt by the router (the dark brown marks in the picture). The pencil line on the left is where the cutout should actually start. When the body was cut out, the template was slightly bigger than needed and more so around the cut out area to allow for final shaping and sanding.


This picture better shows the line where the cutout should start and is the completed neck pocket. On the left side near the line is where I removed the template and forgot to change the maximum depth indicator on the router to compensate. I will correct this using filler and then it won't be as noticeable with the neck on top.


This is an idea of the finished idea. It's actually starting to look like a guitar now. The final scratchplate will be black. This is just to get an idea and is taken from the guitar I got all the measurements from.


Here is a different picture showing off the guitar. Once I clamped the guitar I couldn't help myself!


A few days later I began routing the neck pickup cavity a bit at a time. As mentioned earlier there is a margin for error due to the scratchplate covering up the hole.


In this pickup you can see where I removed the excess wood before the cutout. This was done using a chisel, a hammer and the spokeshave that was used for the edging.


After the cavities were all routed, I routed a channel for the wires from the neck pickup, and then used a drill to create a diagonal hole into the bridge pickup cavity. This will all be hidden by the scratchplate.


This is the finished routing. The channel for wires from the neck pickup finishes just before the pencil line, which is where the scratchplate will come too.


Routing the bridge pickup and control cavity was quite nerveracking as the holes are 3cm deep, and the guitar is only about 4cm thick. This was a true test of the depth indicator and then I discovered that 3cm is as far as my router cuts anyway.

-L

Thursday 5 August 2010

Wood Shaping

Hello world.

So today (for the entire day) I decided to begin the task of sanding the edges of the body, and curving all the edges using a spokeshave.


I marked the edges out in pencil so that I can see on each side where the curve starts and ends. Luckily with curves you can sand them in so they all look ok together. Which means that if there are a few errors they can be fixed quickly!

I started on the back first so any catastrophic mistakes would not be as noticeable. luckily this did not happen.


When I began using the spokeshave patterns like the picture below appeared in the wood.


I later discovered that this was due to an excess amount of the spokeshave blade coming into contact with the wood. This wasn't a problem as after each go with the spokeshave I used sandpaper to smooth the wood out, being that I spent the first hour or so paranoid that I was going to ruin this lovely piece of wood!

After awhile I calmed down and began to enjoy the spokeshaving process (geek!). I found it theraputic, except for the fact that as with all wood working tools, you have to sharpen the blade every 5 mins or so of use to keep the edge razor sharp.


This is quite tedious and is done using a sharpening block and some 3 in one oil. The process of sharpening isn't so bad, it's taking the spokeshave apart with a screwdriver everytime that's annoying.


After alot of sanding you end up with a smooth curve all along the edges. This isn't very even at the moment, but will be sorted during the final stage before applying the lacquer,

After the back was completed I moved onto the front. Spontaneously I decided to add an arm rest like you find on a strat as I felt it would be more comfortable, plus it's another feature that makes this Telecaster unique.


I did this with the same spokeshave. I drew a line diagonally across the surface of the guitar where the arm rest would stop. I removed small sections of wood at a time and sanded as I went along to check the progress.

Once I finished the arm rest I continued curving the rest of the guitar until finished.


This is the almost-finished article. More sanding will take place just before the painting and the final finish to remove any dents or blemishes from the wood.

Next step will be routing the wood, once I buy a dremel tool (may be a week or so).

-L